Wednesday, September 30, 2009
Tuesday, September 29, 2009
Tuesdays Tips and Tuts
Welcome to DSM's 1st Tuesday Tutorial! Brought to you by Designs by Ashlee!
To do this tutorial you will need some basic knowledge of Photoshop, but the instructions are pretty simple. Photos are included to hopefully make things easier!
Stitch on A Text Tutorial
STEP 1
Type out your text in the size and font of your choice
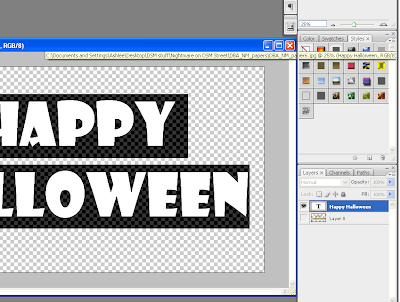
STEP 2
Right click your text layer and choose Creat Work Path
(your text will have a solid outline, i've added a background to show this)
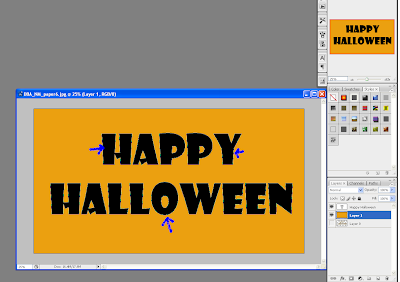
STEP 3
Create a new layer above your text, call it stitches
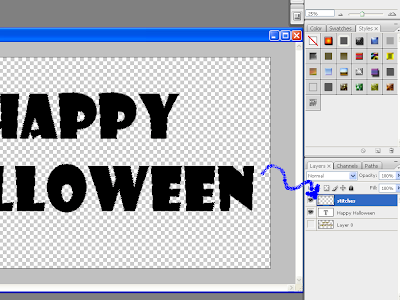
STEP 4
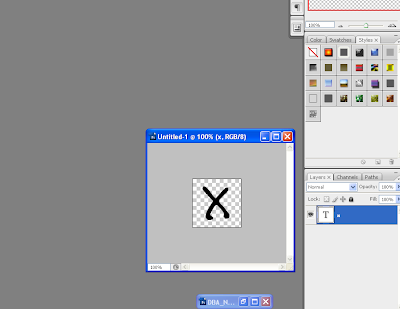
Now to create our stitch. Open a new document 100x100 and choose a font with either a letter X or V
(which ever you prefer for your stitch)
STEP 5
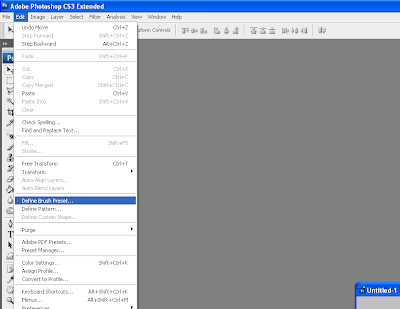
Go to Edit>Define Brush Preset and save your stitch
STEP 6
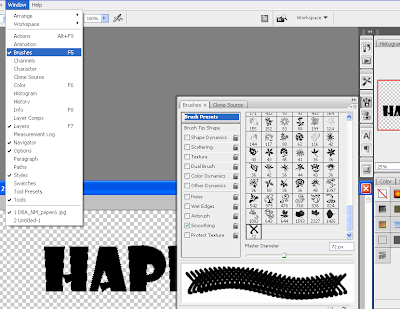
Back to your text, select your brush tool and choose Brushes from your window menu
STEP 7
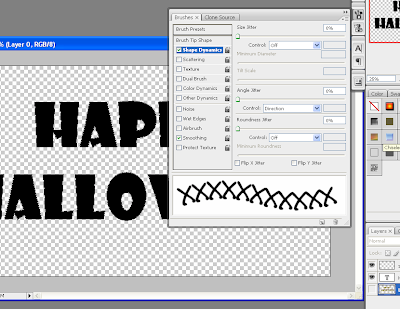
Adjust the size oof your brush to a size that works with your text and place your spacing around 90%
(play around with it) & set your shape dynamics to match Step 7 pic
STEP 8
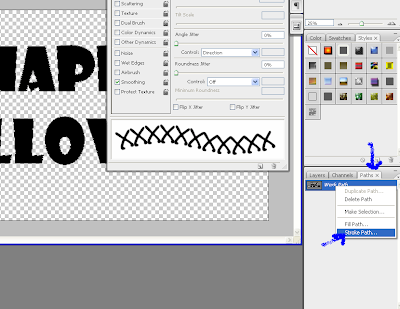
choose the color of your stitch, select the stitches layer and choose paths on your layer palette.
Right click your work path & stroke path with your bru
STEP 9
Click back on yourlayers palette, should look similar to the Step 9 image. (a background was added to show the effect)
If you don't like how the stitching looks, play around with the brush settings until you reach your desired effect.

To do this tutorial you will need some basic knowledge of Photoshop, but the instructions are pretty simple. Photos are included to hopefully make things easier!
Stitch on A Text Tutorial
STEP 1
Type out your text in the size and font of your choice

STEP 2
Right click your text layer and choose Creat Work Path
(your text will have a solid outline, i've added a background to show this)

STEP 3
Create a new layer above your text, call it stitches

STEP 4
Now to create our stitch. Open a new document 100x100 and choose a font with either a letter X or V
(which ever you prefer for your stitch)

STEP 5
Go to Edit>Define Brush Preset and save your stitch

STEP 6
Back to your text, select your brush tool and choose Brushes from your window menu

STEP 7
Adjust the size oof your brush to a size that works with your text and place your spacing around 90%
(play around with it) & set your shape dynamics to match Step 7 pic

STEP 8
choose the color of your stitch, select the stitches layer and choose paths on your layer palette.
Right click your work path & stroke path with your bru

STEP 9
Click back on yourlayers palette, should look similar to the Step 9 image. (a background was added to show the effect)
If you don't like how the stitching looks, play around with the brush settings until you reach your desired effect.

Monday, September 28, 2009
Monday Mania
Hey everyone!
ModernJune here bringing you a new addition to our blog "Monday Mania" Each week we will be showing you new product that we have loaded into the store!
So lets get this party started!
ModernJune here bringing you a new addition to our blog "Monday Mania" Each week we will be showing you new product that we have loaded into the store!
So lets get this party started!
This is packed to the brim with Halloween goodies:
17 Patterned Papers
5 Solid Papers
9 Assorted Bows
2 Bats
1 Flying Bats
1 Half Moon
3 Beads On Strings
1 Candy Bowl with Hand
1 Cauldron
2 Candy
1 Black Cat
4 Word Clips
3 Halloween Cookie Shapes
1 Skeleton Cross Bones
5 Knotted Ribbon
1 Flair
2 Flowers
2 Tri Frames with Ribbon
1 Monster
3 Ghosts
2 Witches Hats
2 Tags
2 Jack-o-lanterns
1 Ribbon Chain
1 Spider
1 Spider Web
1 Tree
1 Trick Or Treat Monsters
1 Flying Witch
Gorgeous right?
13 Papers
30 Elements:
3 paper clips
2 frames
1 cloud
1 rainbow cloud
1 sun
5 ribbons
5 bows
3 flowers
3 dragonflies
3 butterflies
1 tree
2 glittery doodles
Mandy Made's "Roots"
2 metal badges
6 ribbons
12 frames
2 leaves
4 glittery ellies
7 strings
8 family tree maps/templates
6 stitchings
1 tab
3 tags
6 flowers
4 buttons
2 clocks
1 envelope
1 file folder
1 paper bracket matte
61 textured papers
9 worn papers
1 family tree
1 quick page
This Mega kit has all you need to start those family albums!
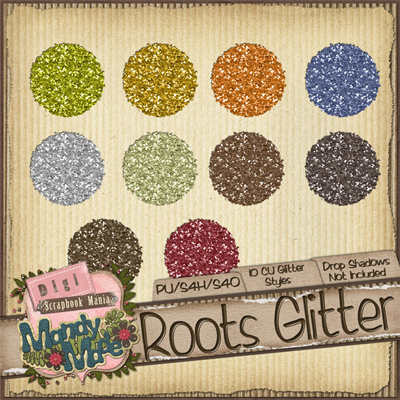
You can also get 10CU glitter styles sold seperately!

6 paper borders
15 plain papers
28 patterned papers
10 frames
7 glitter swirls
2 glitter borders
11 pieces of word art
5 alphas
54 elements
15 plain papers
28 patterned papers
10 frames
7 glitter swirls
2 glitter borders
11 pieces of word art
5 alphas
54 elements
and as a special bonus when you purchase Hocus Pocus you get this 10 page brag book for free!
ModernJune Creations' "Hocus Pocus Glitter Styles"
55 papers
5 backwards brads with shadows
10 binders clips
5 bottle caps
5 bracket frames
5 buttons
5 chipped paint swirls
4 round frames
2 date wheels (including month wheels, day wheels and year wheels)
2 date wheel pointers
10 colored cloth tags
1 single frame wrap
1 double frame wrap
3 multi opening frames
2 leather string wraps
10 glass pebbles
10 polka dotted tape pieces
1 raffia wrap
4 rectangular frames
6 curled ribbons
2 ribbon flowers
4 rubber bands
1 ribbon wrap
1 set of stitches
15 tags
3 solid colored tape pieces
Holy Cow that is a lot of kit!
Holy Cow that is a lot of kit!
Sunday, September 27, 2009
 I sure had fun poking around the gallery for this weeks standouts... seriously there were so many to choose from... this is what I snagged for this weeks Gallery Standouts...
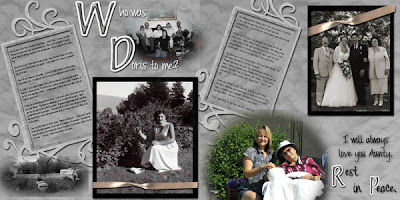
First up is a LO from Scrapnewbie... I'm loving those shadows! Credits here.
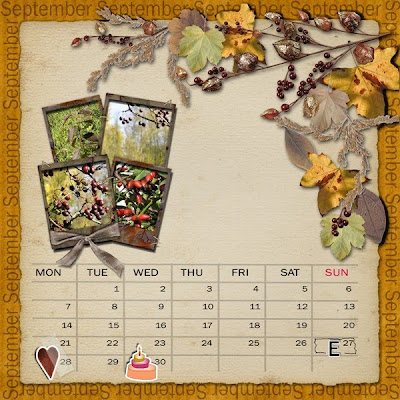
I'm all about fall these days... it is in the air! Delia made this wonderful fall calendar.. credits here.
Next is a wonderful LO by Digilicious. I love the warm colors, word art and mini ellies!! Credits here.
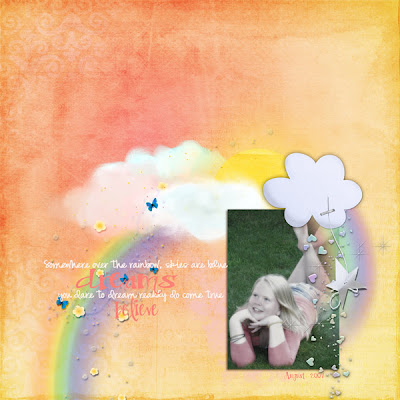 Now for another fab fall LO... I LOVE the scattering of the ellies... there is so much to see in this LO. Credits here.
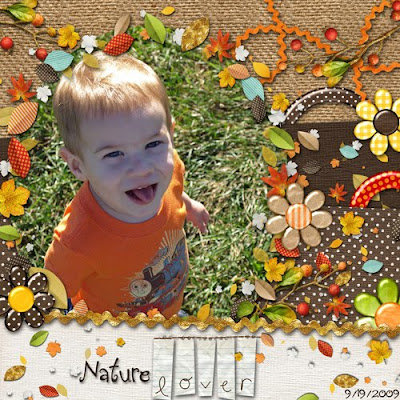
Now here's a wonderful Lo by Tomosia... this is a new kit by our own Modernjune Creations called Hocus Pocus... great LO tomosia love the colors and great picture!! Credits here.
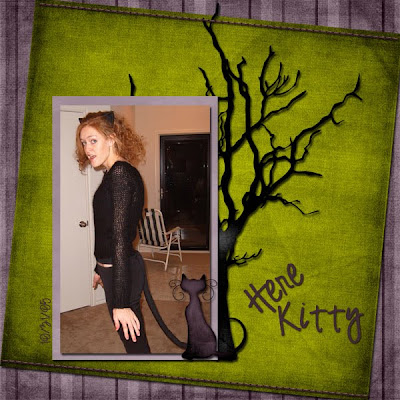
I love this Lo by Mom2twoangels... I love the straight lines, mixture of papers and fab ellie placement! Credits here.
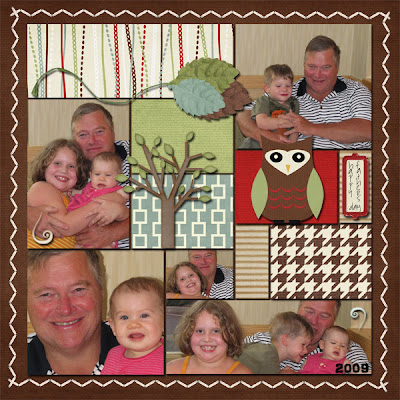
And lastly we have out own Missdamsel.... working her soon to be released Breast Cancer Awareness Kit ... I can't wait to play with this one!!! I just love everything about it! Scrapliftable!! Credits here.
Friday, September 25, 2009
Friday Freebie time!
Today's Friday Freebie is a great Personal Use glitter Style and Glitter papers by Mandy Made Designs! These glitter styles match the new kit Rachel's Room by Damsel Designs that will be available on Monday. (click picture to go to store.)
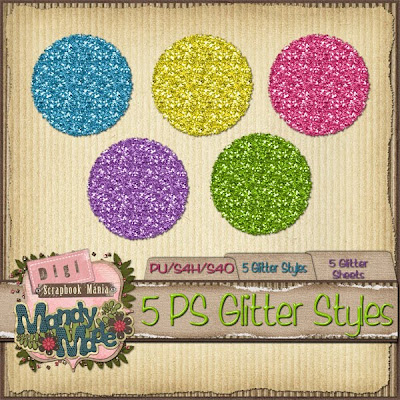

and here is the kit which will be available Monday in the store!

Tuesday, September 22, 2009
Sunday, September 20, 2009
Gallery Standouts for Sept 13th to 16th.
 I'm back with this weeks Gallery Standouts!!!
There were quite few to choose from...
First off is a LO done by mom2twoangels using the DSM DT's Camping is In Tents Collab... great layering and clustering!!
For Credits click here.
Next is digilicious and her LO she named Liar... really well done and a funny little story to boot!

Click here for credits.
Next up is a LO I did for the Scrap This Way Challenge at DSM... We had to get creative and cut holes in the paper... I used the Autumn Spice Collab Kit in this LO... (my new fav kit!)
Click here for credits.
Next is another wonderful LO by our own digilicious.... I love how the word art is placed
and the editing of the photos!!! Fab!
Click here for credits.
And the last LO for the week is by Twimomma2... I'm loving the use of a large tag... I must try this!
Click here for credits.
Well done everyone... hope you have been inspired by some of the creative ladies in our forum.... If you haven't checked us out yet please do... we have a lot of fun in our forum, loads of challenges and a speed scrap everyday!! Hope to see you there!!
Subscribe to:
Comments (Atom)


